

How to draw in the Tintin style - smithcathe1941
How to draw in the Tintin graphics style exploitation Photoshop
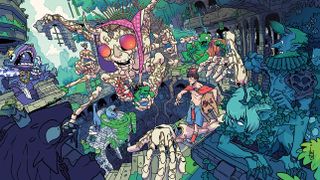
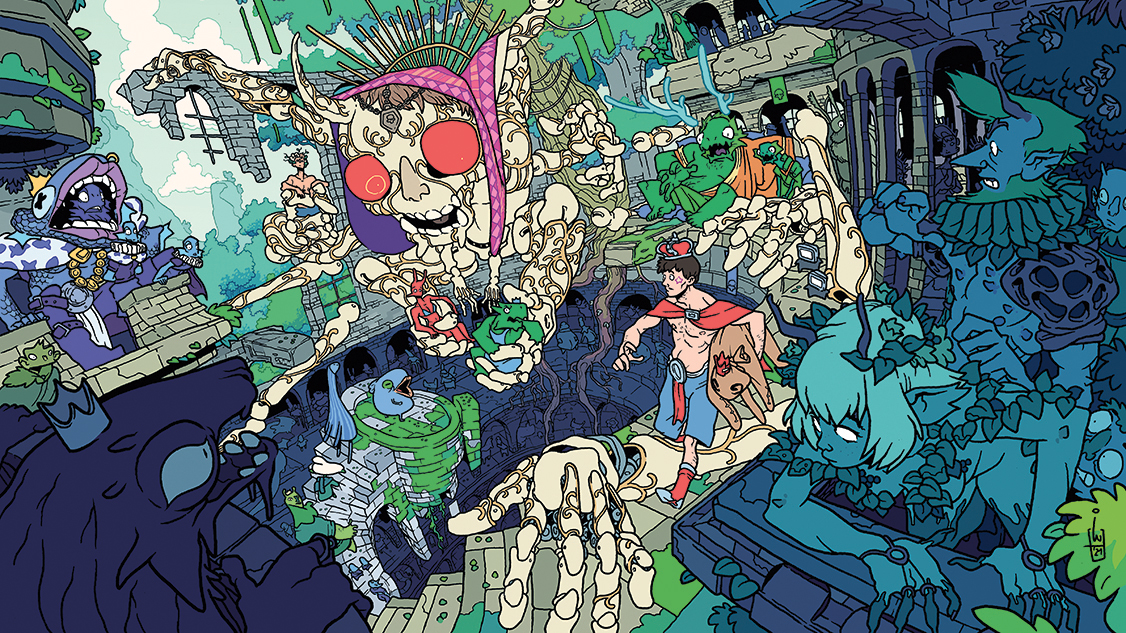
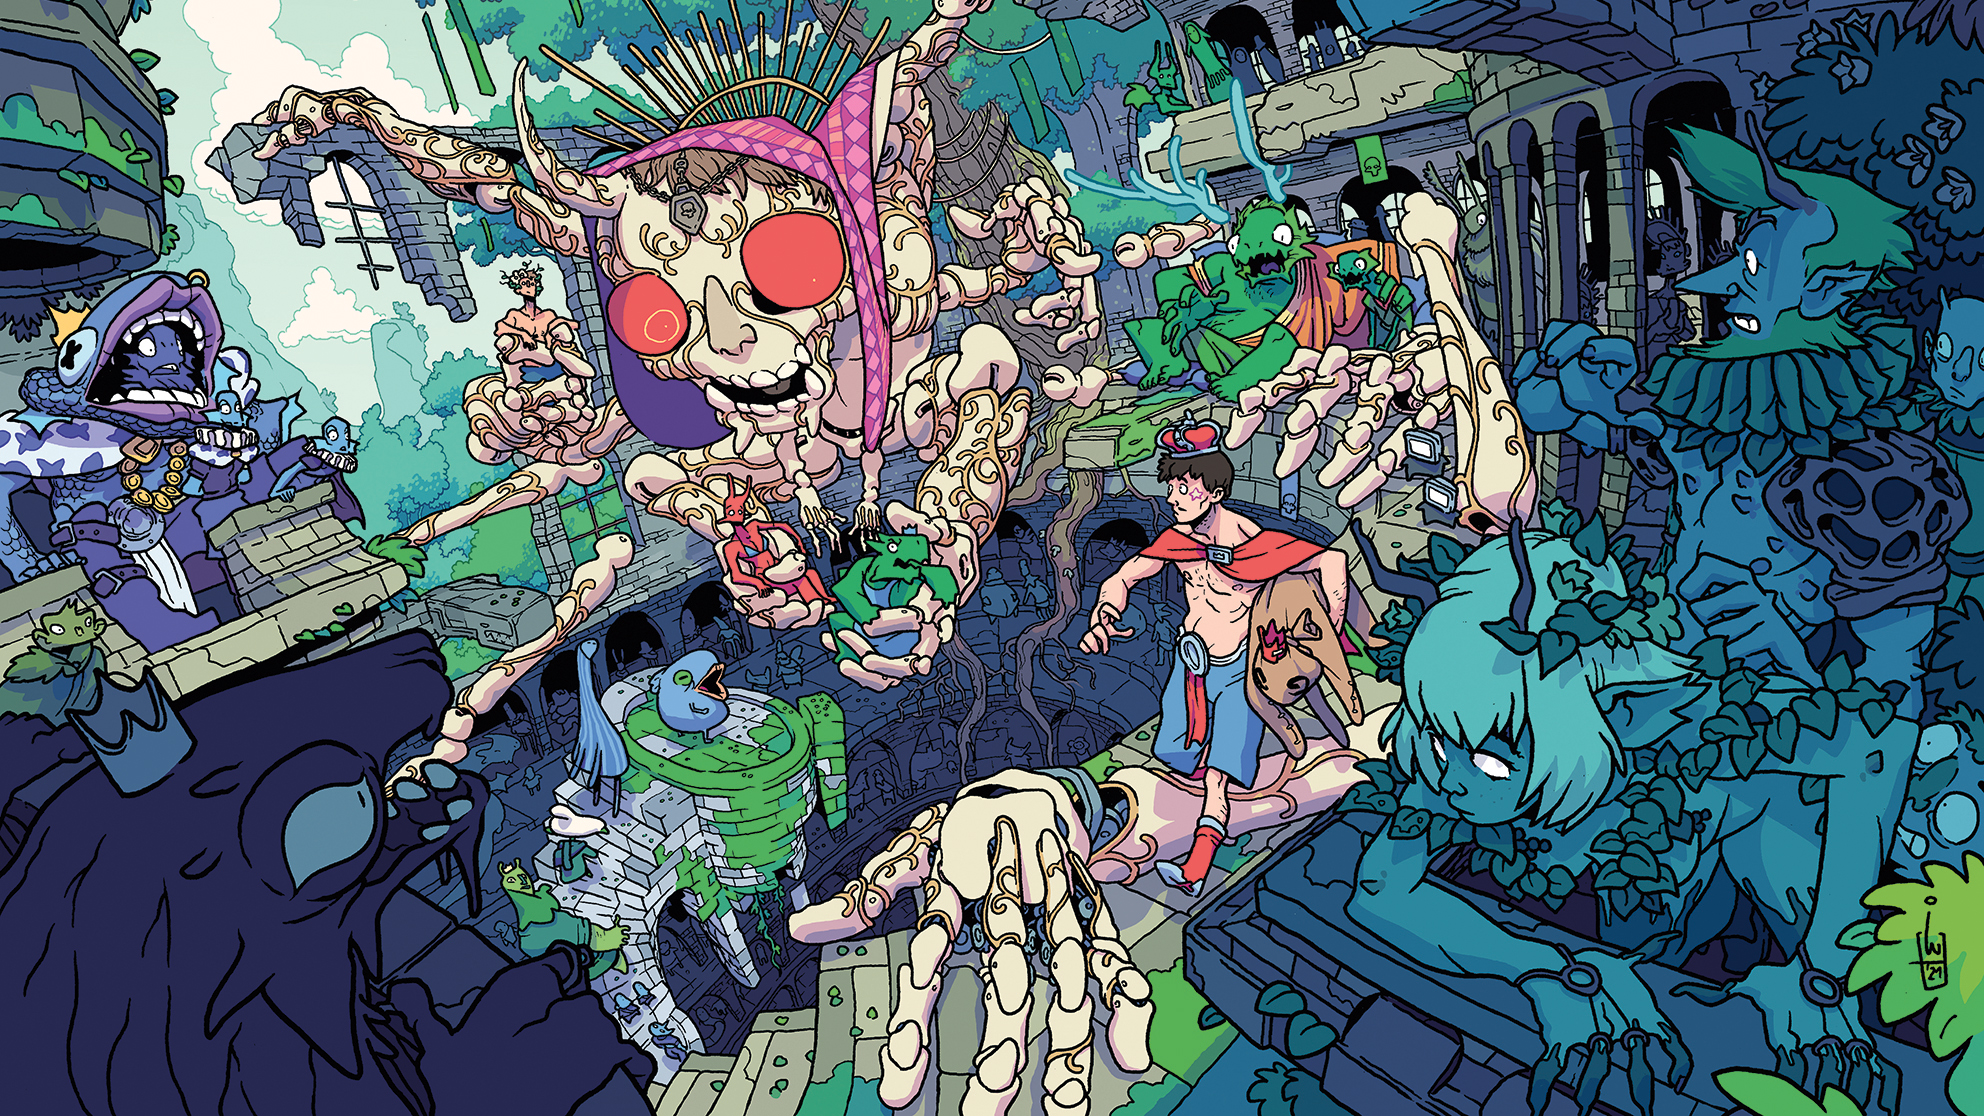
Drawing off in the Tintin style, or Ligne Claire stylus, is something comic artist Igor Wolski specialises in doing. The artist writes and draws, which means when he sits down to compose a jury or man of art in that 'Tintin' style, he always has an idea in his head. With that said, he'll work through he concept in sketches as he goes.
For this tutorial Wolski is victimisation Photoshop, and he'll share the tools, features and work flow he's using. If you're inexperienced to Photoshop then get a load at our extensive 68 bright Photoshop tutorials to try feature, or plainly download Photoshop for freeborn and being experimenting.
Take ImagineFX and deliver 40%
Drawing in this style requires a lot of planning. "When cramming info into one frame, you have to think about how the viewer's eyes are going to travel across it, what's going to pop and what's going to be subtly hiding in the play down," says Wolski. "Every element might be just decoration, but can also be a piece of information for the viewer to pick up on."
You can follow along on the video or scroll thrown to read Wolski's step-by-step process in detail…
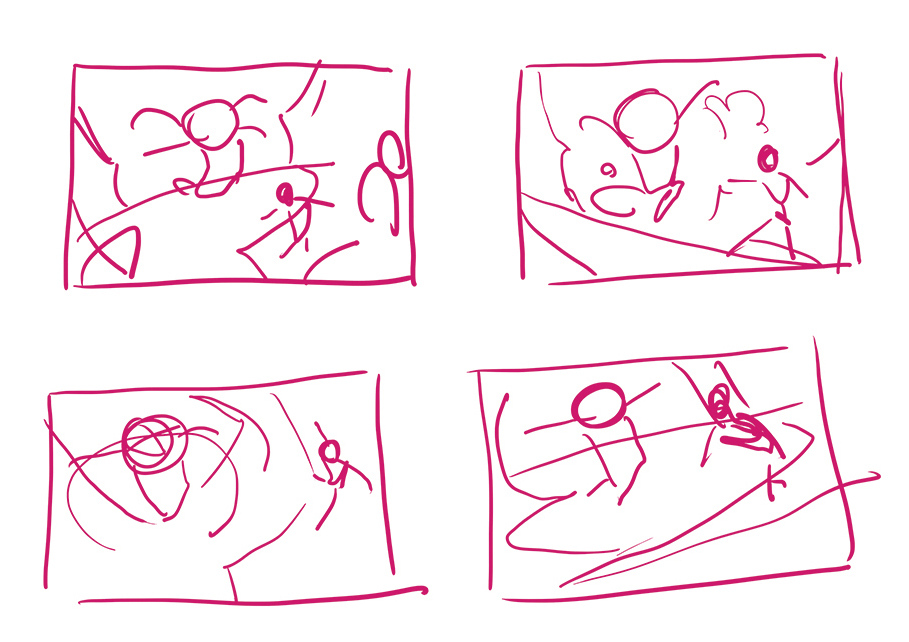
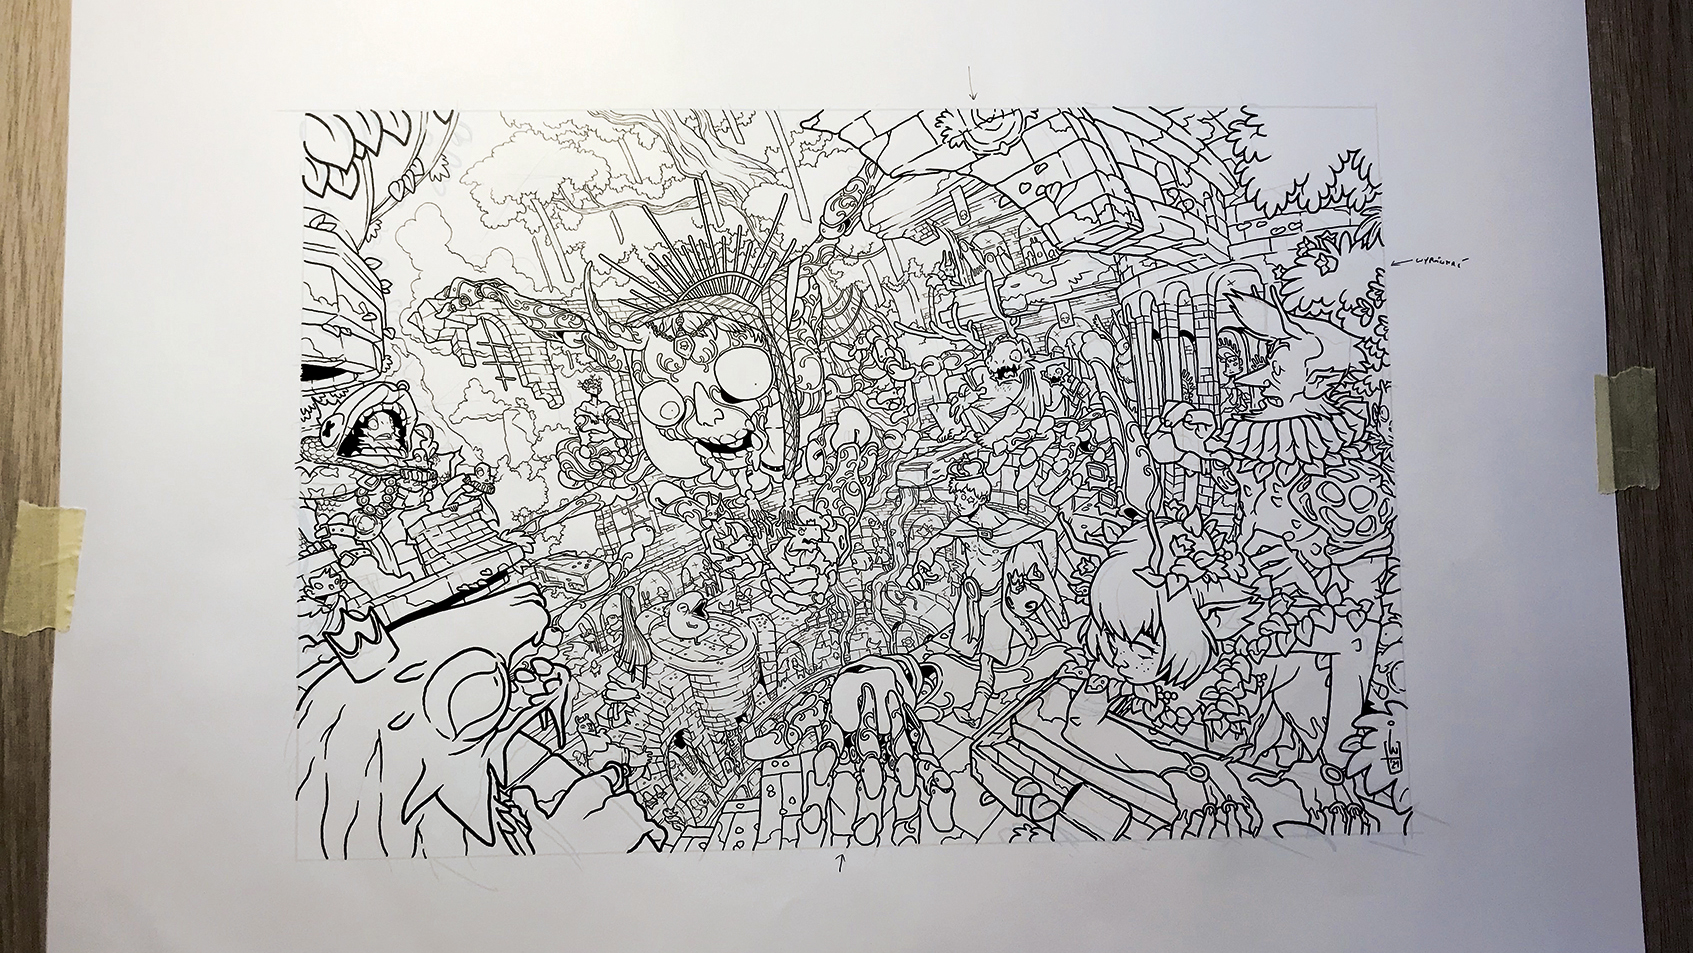
01. Start with a thumbnail sketch
(Image: © Igor Wolski)
When it comes to creating bigger pieces, comme il faut planning is distinguish. Once I have the idea, I start brainstorming with A-one-quick sketches, just to find the first opus and the point of panoram to bounce off of; these are very rough and often unreadable to a bystander. It's almost ilk I'm authorship in my own closed book language.
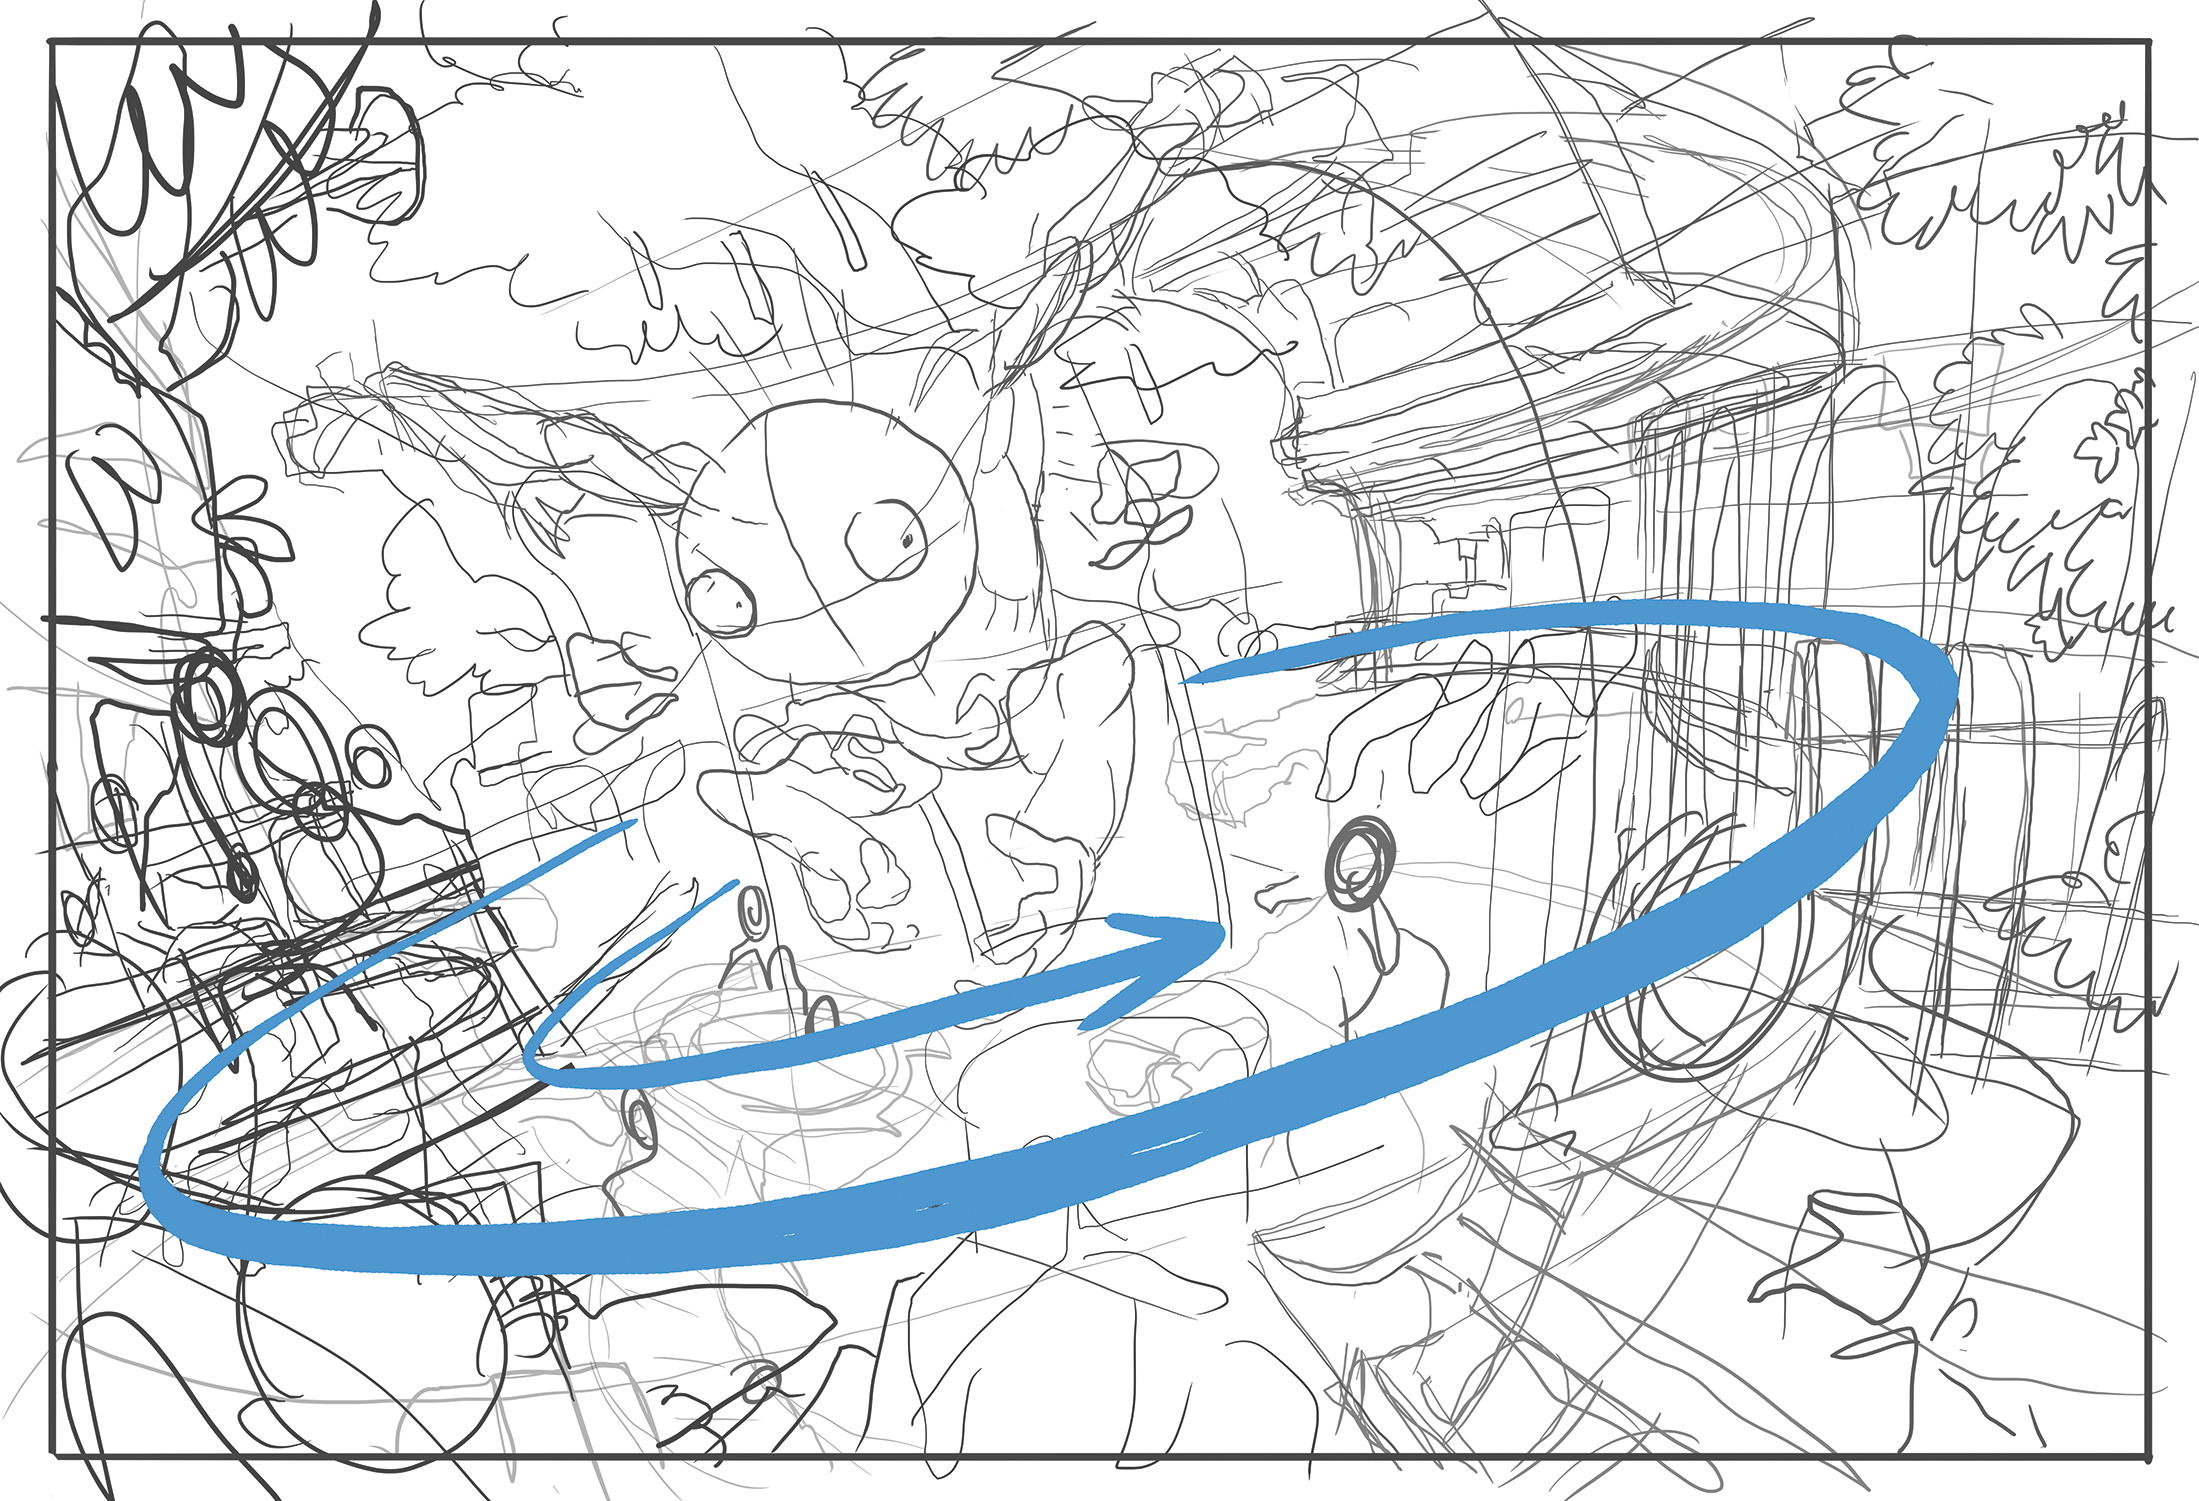
02. Develop the concept
(Image: © Igor Wolski)
After finding the mountainous piece of music, I place it at the bottom of the layer spate on a low opaqueness and start adding details over it. Here I plan the set out of the characters and objects. I also frame everything in a form of a spiral, from the bottom-left corner to the character in the middle.
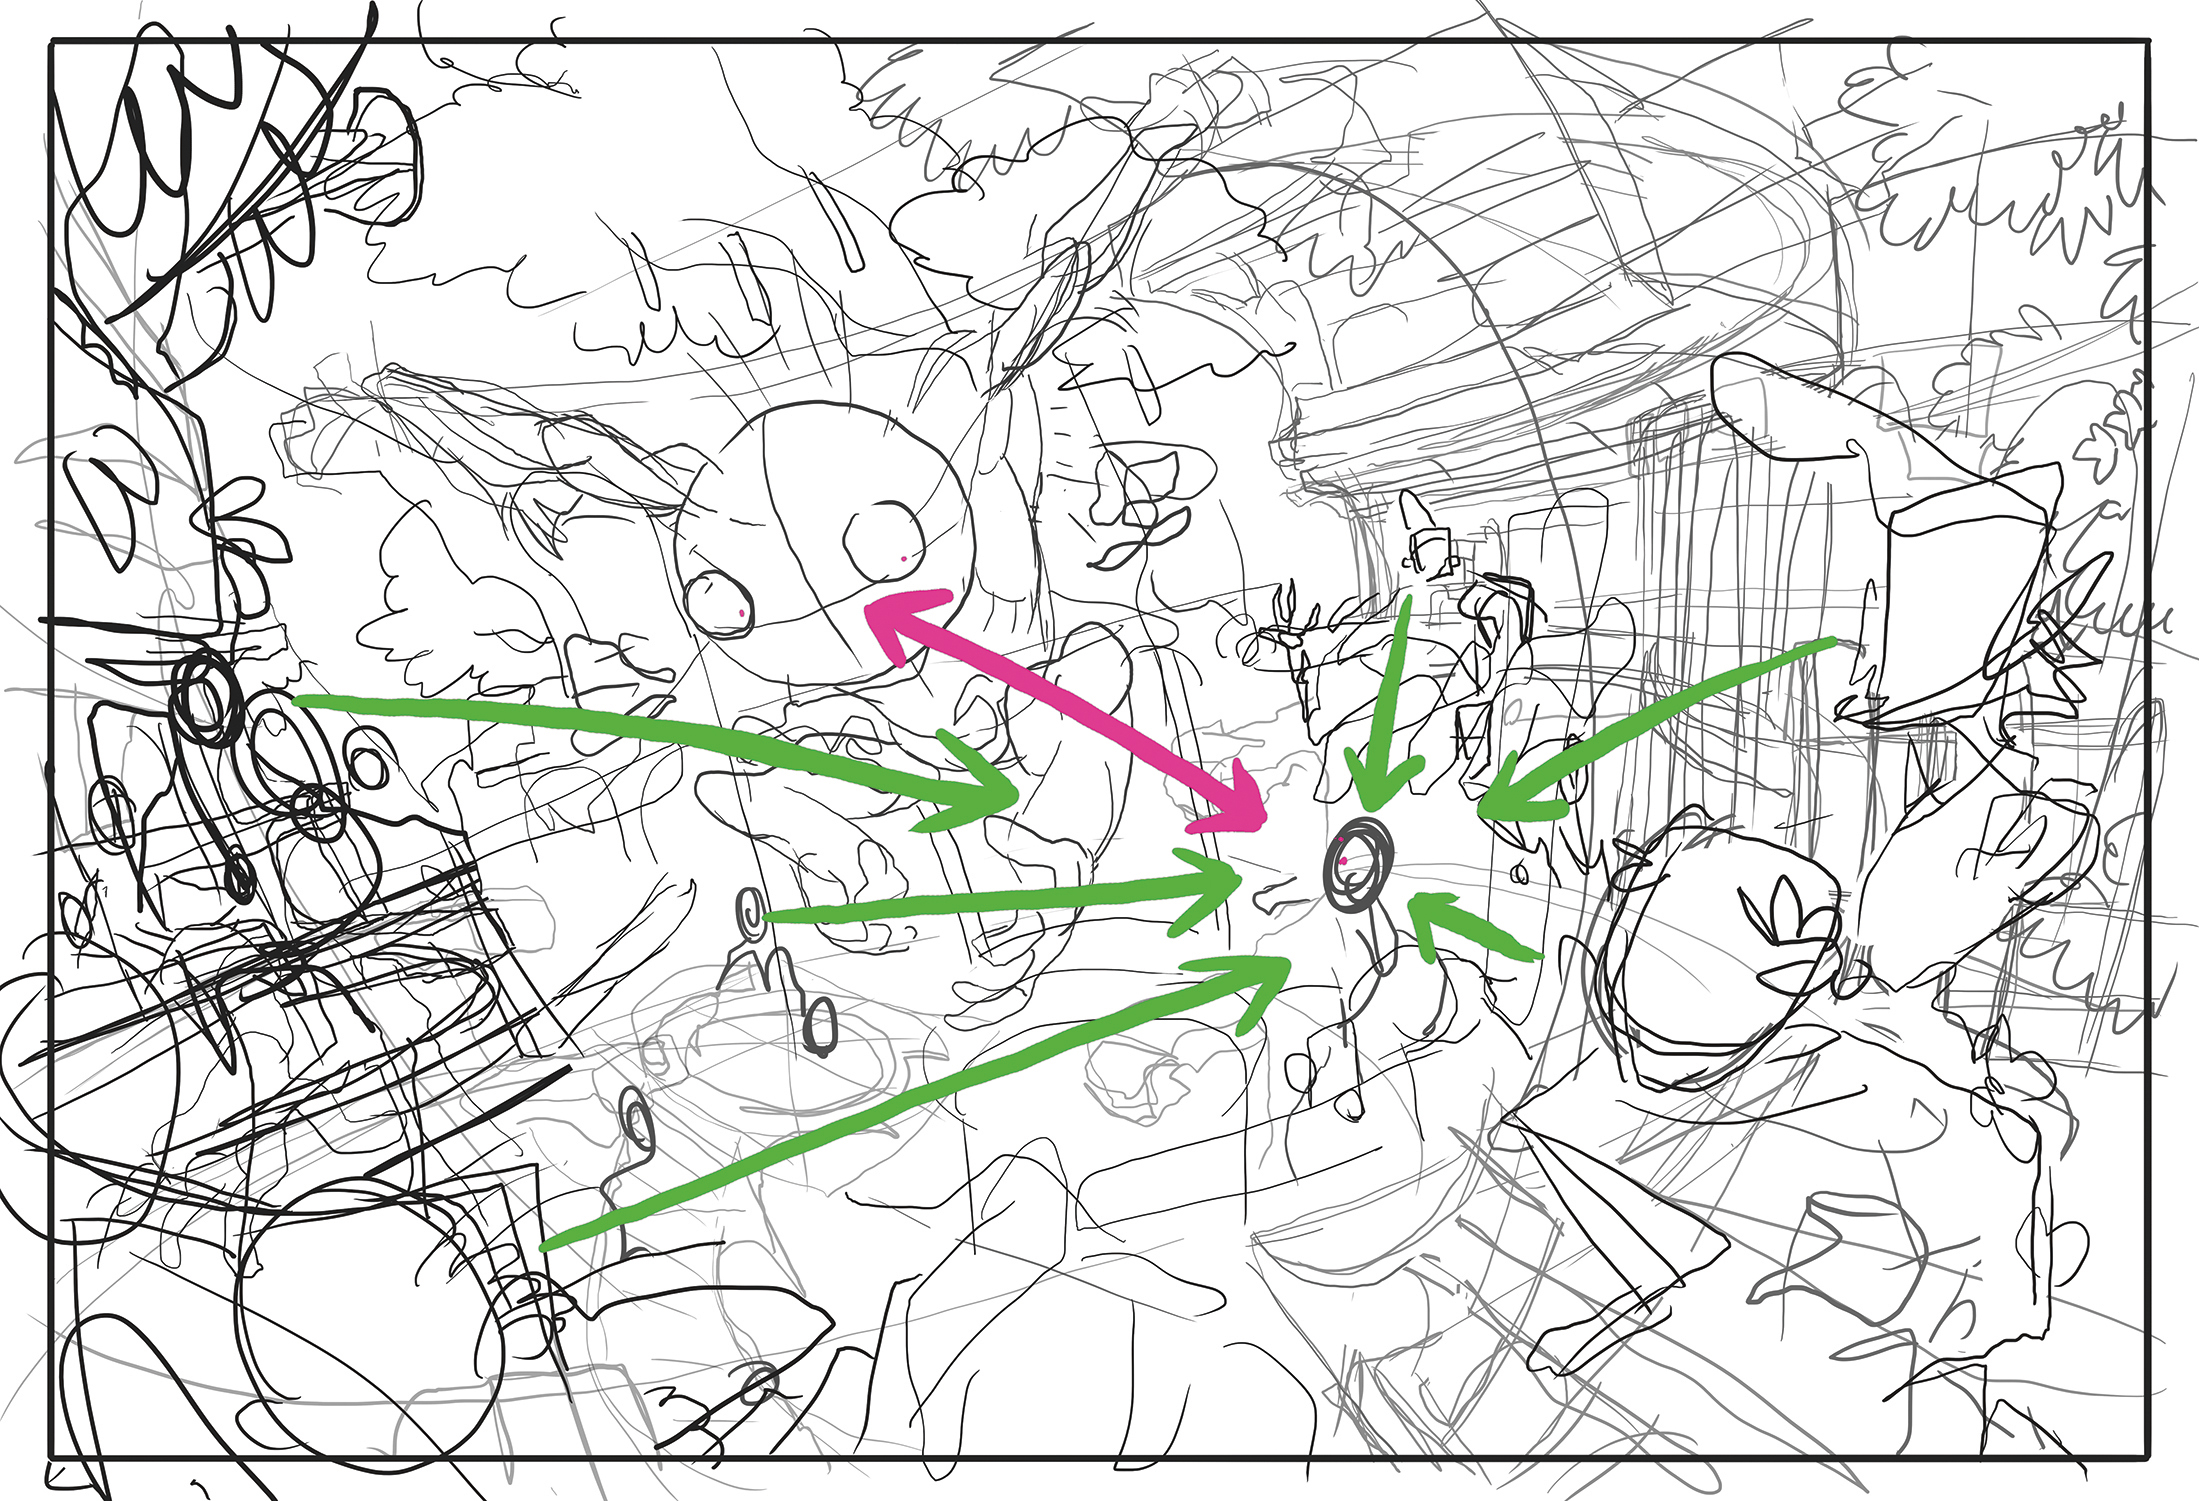
03. Develop the storytelling in the scene
(Persona: © Igor Wolski)
I consider the story in an illustration is told through and through the expressions and sight-lines of its figures, so I check where the main and substitute characters are looking. Our poor boy has snuck into an event and has been discovered, sol while atomic number 2 looks at the lookout man, everyone else looks at him.
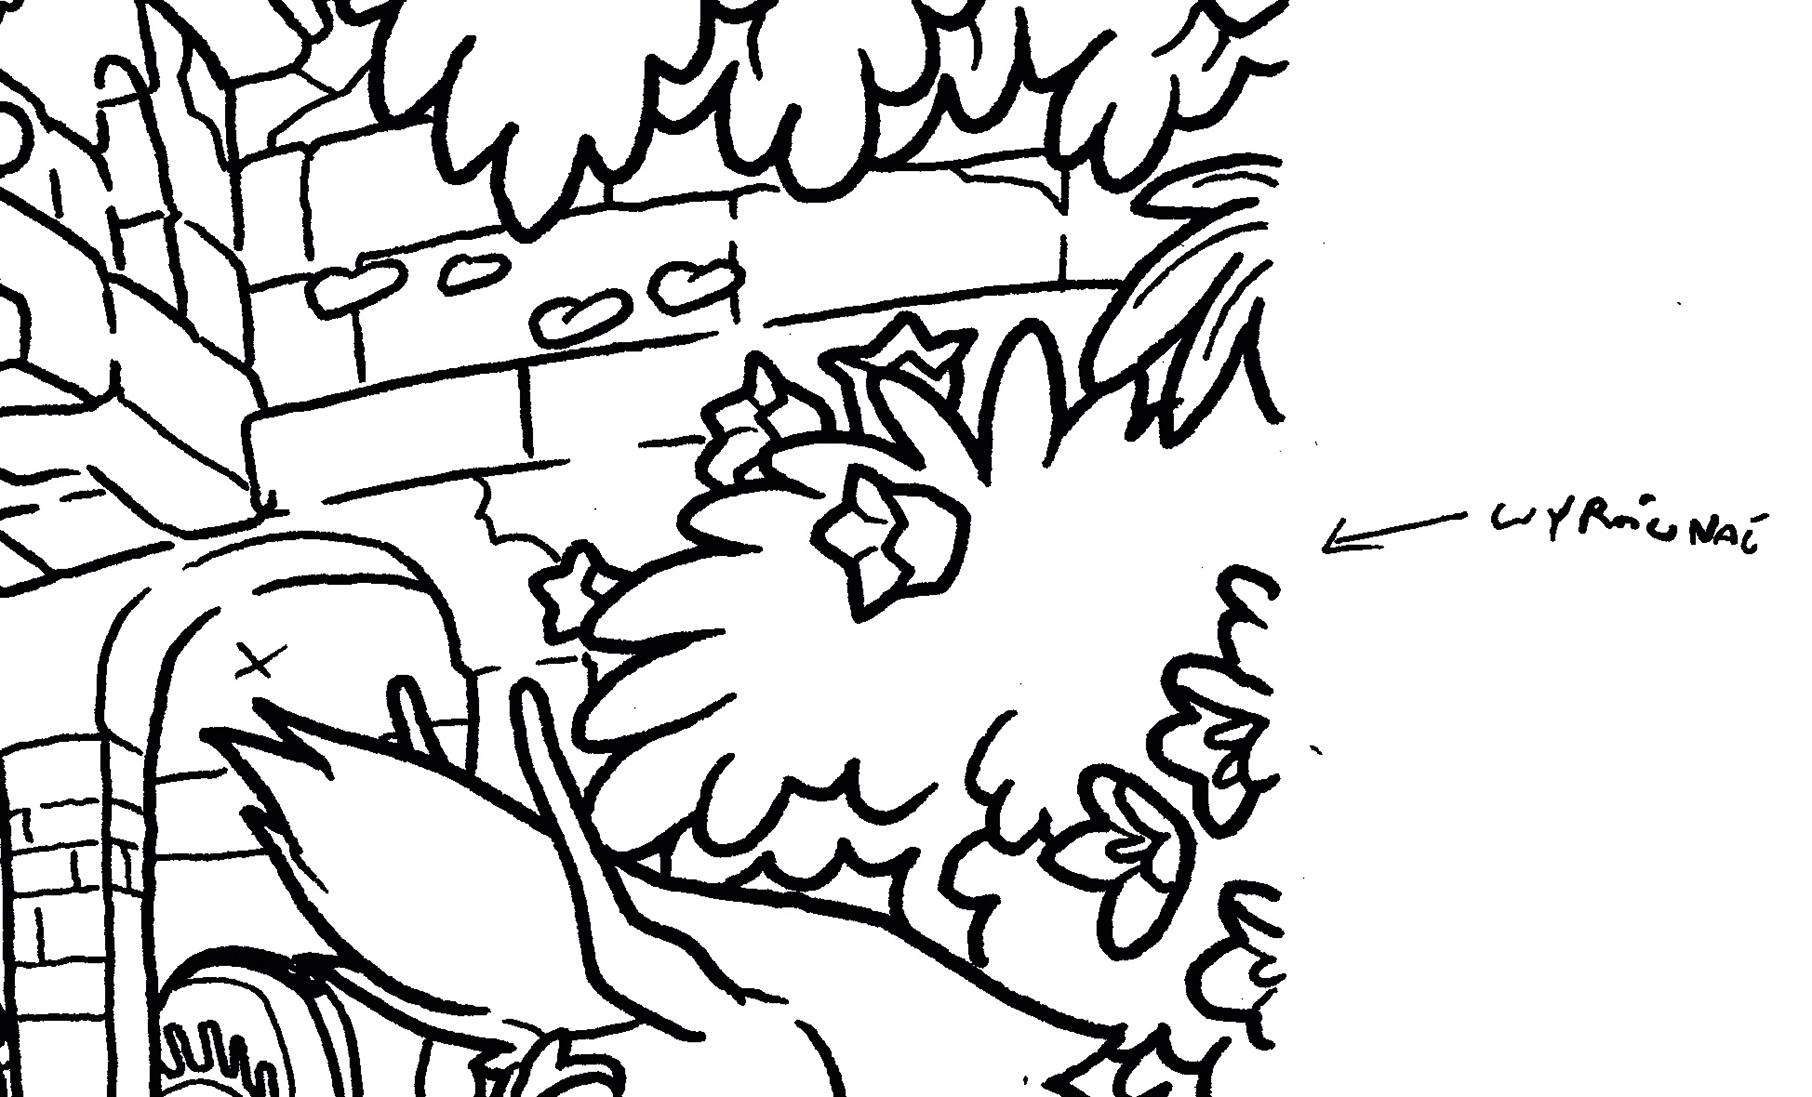
04. Wont 5-stage perspective
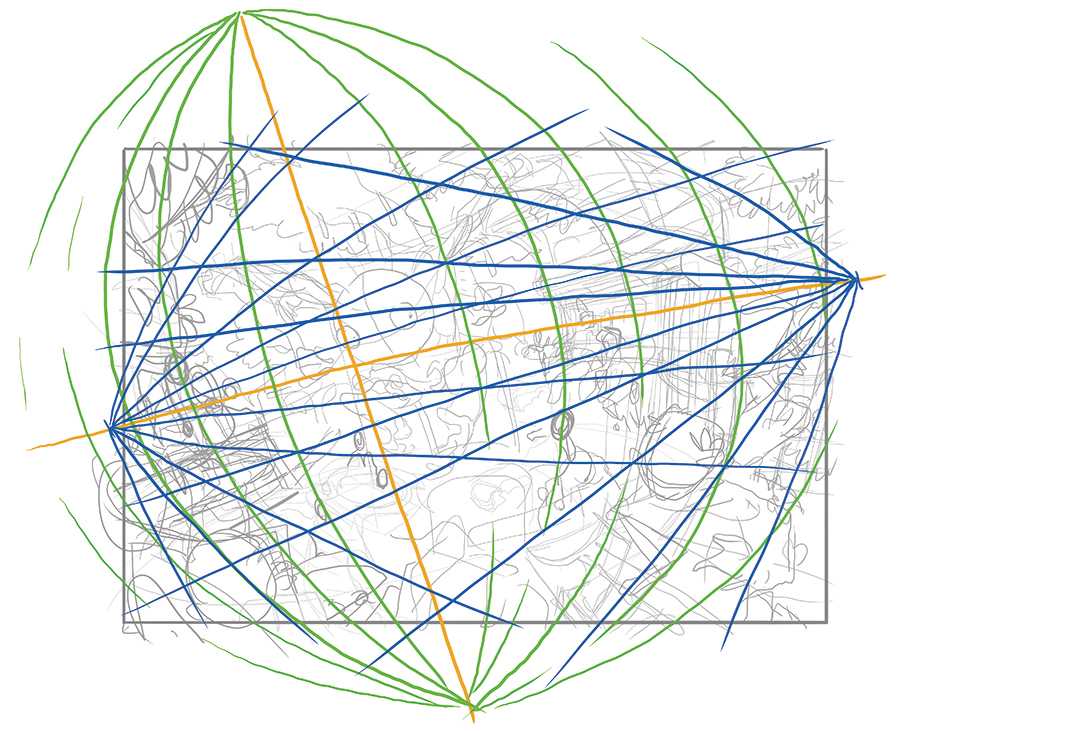
(Fancy: © Igor Wolski)
I draw perspective lines based on my sketch. I start by identifying the horizon and then elaboration where the middle of my composition is on it. From there I add the vertical and horizontal lines, by estimating where they should be by sounding at my sketch. Note that it doesn't have to follow very precise.
05. Use models and reference
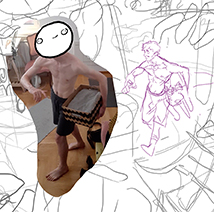
(Image: © Igor Wolski)
I try to use references as much A I can, to help prosper my visual library. For people I either just search online for what I deman or take a picture of myself or my family. For apparel, architecture or other objects I like to admit accidental online finds, which ensures that something unexpected ends up in my art.
06. Finish the sketch
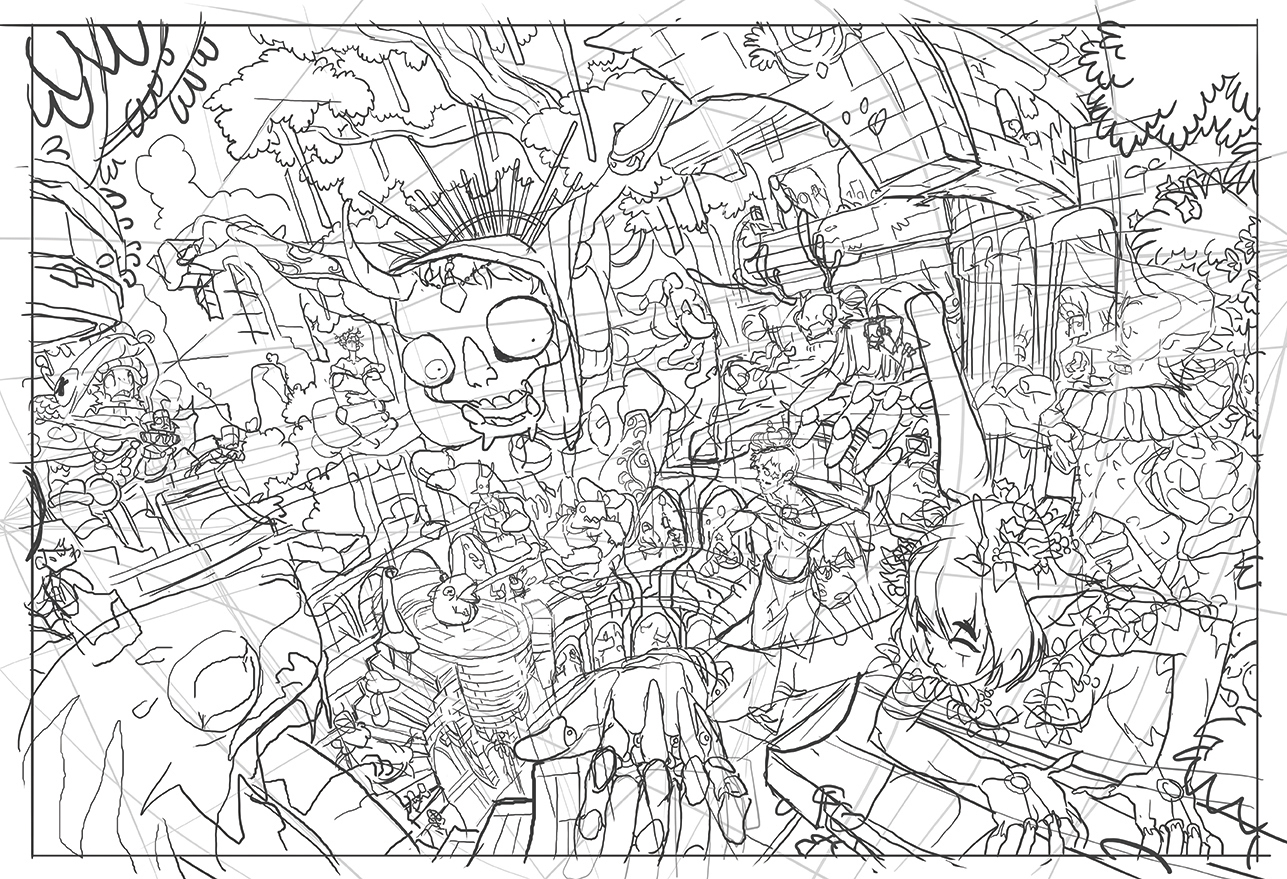
(Image: © Igor Wolski)
Straight off I finish up all the details. I like my drawings to seem identical cluttered, so I try to never think about any unmatched thing as a standalone aim, but many Eastern Samoa big clumps of many an objects. I usually achieve this by always having my characters and items placed along multiple levels, often sitting OR stacked happening summit of one some other.
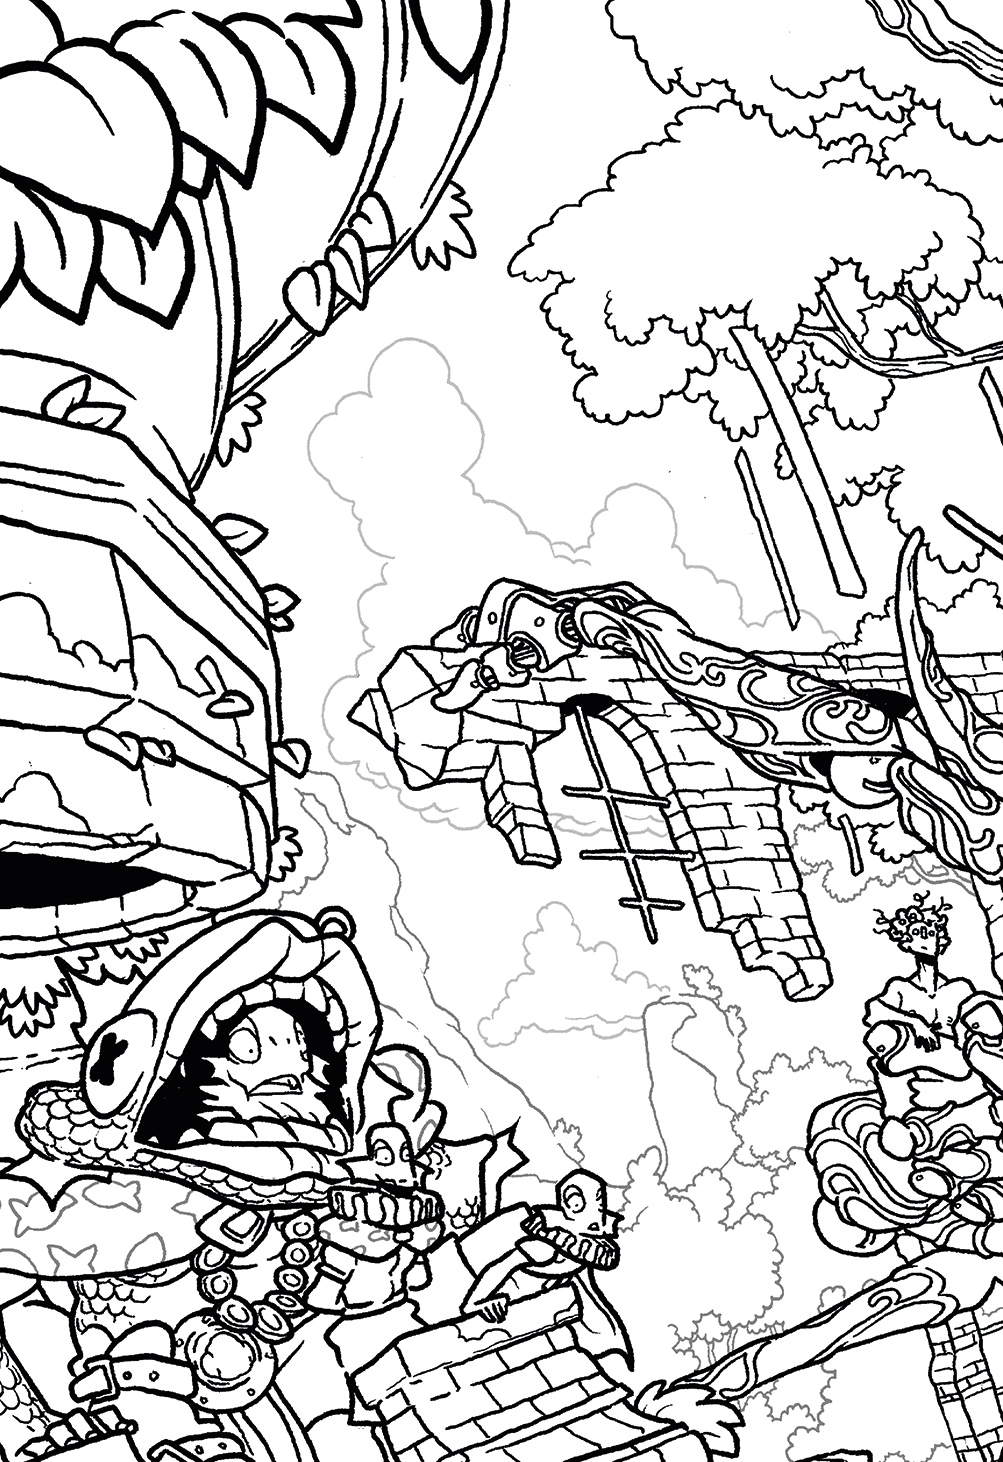
07. Print out the chalk out
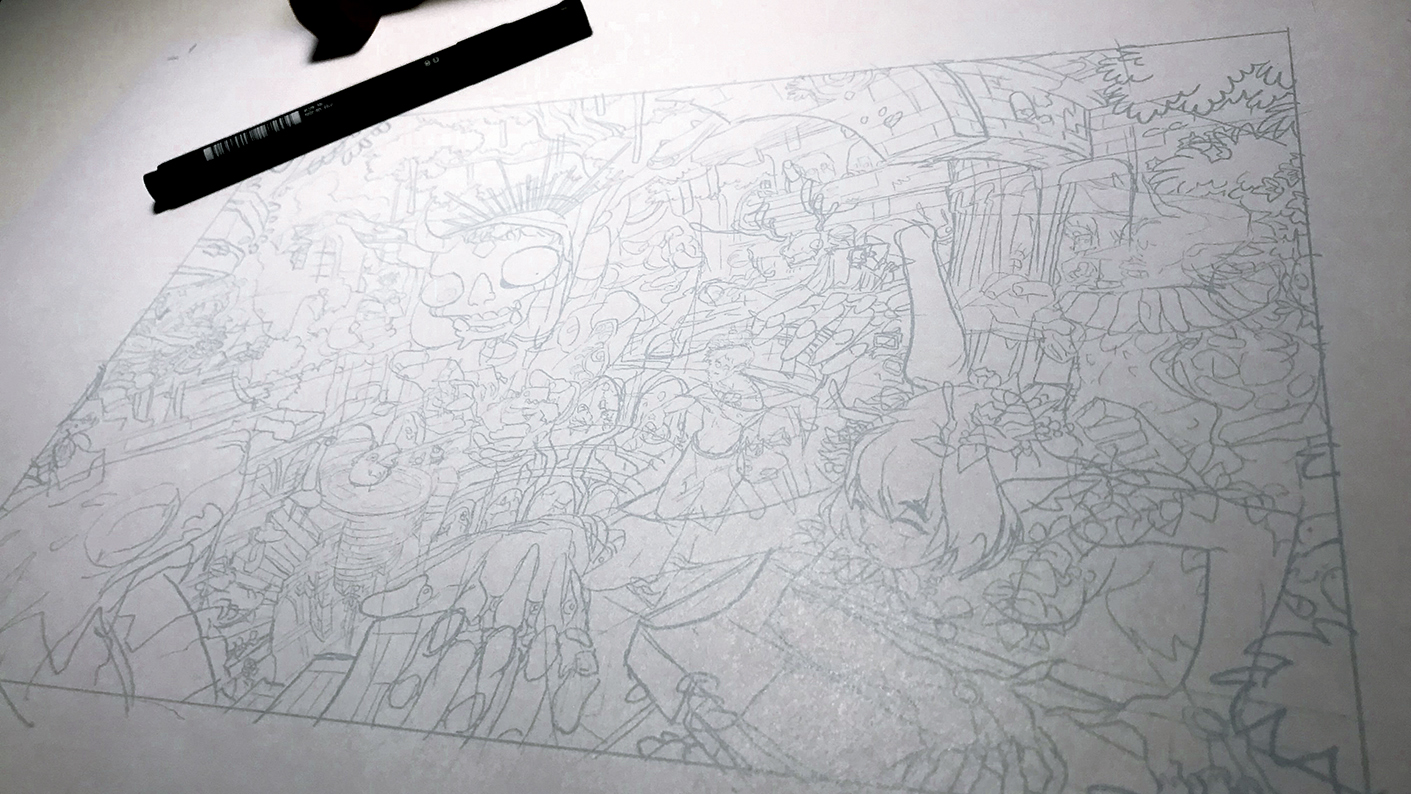
(Image: © Igor Wolski)
Because I still the likes of to do a large clump of my work traditionally, at this point in time I print out the finished cartoon on paper in a very light blue colour. Carrying out this stage on paper doesn't give me any reward over doing it digitally – it's just my personal preference.
08. Ink the bank line-art
(Image: © Igor Wolski)
For agate line-art, I use Uni Pivot Fine-grained Line black ink pens, ranging in size from 0.05 to 1.0mm. The only rule I accompany here is that the closer the targe is to the viewer, the thicker the line. If I make any mistakes I'll fix them later in Photoshop; I like to write small notes on the side of the theme to remind myself.
09. Move out back into Photoshop
(Image: © Igor Wolski)
I scan the image in at a high resolution (usually 600dpi) American Samoa a monochrome bitmap. This creates hard, pure black line-art without any anti-aliasing. It may look rough, just it gives the image a unique, spunky feel. Next, I mend any mistakes I've done along paper, following my notes.
10. Set the line art and colour
(Image: © Igor Wolski)
The last thing I do earlier colouring is to divide the lines that I want to colour from the black ones I wish to leave intact. This way everything in the backdrop, any light sources or patterns, or anything that would benefit from a smoother line. I select the lines I desire to abstracted and put them on different layers.
11. Group the colours
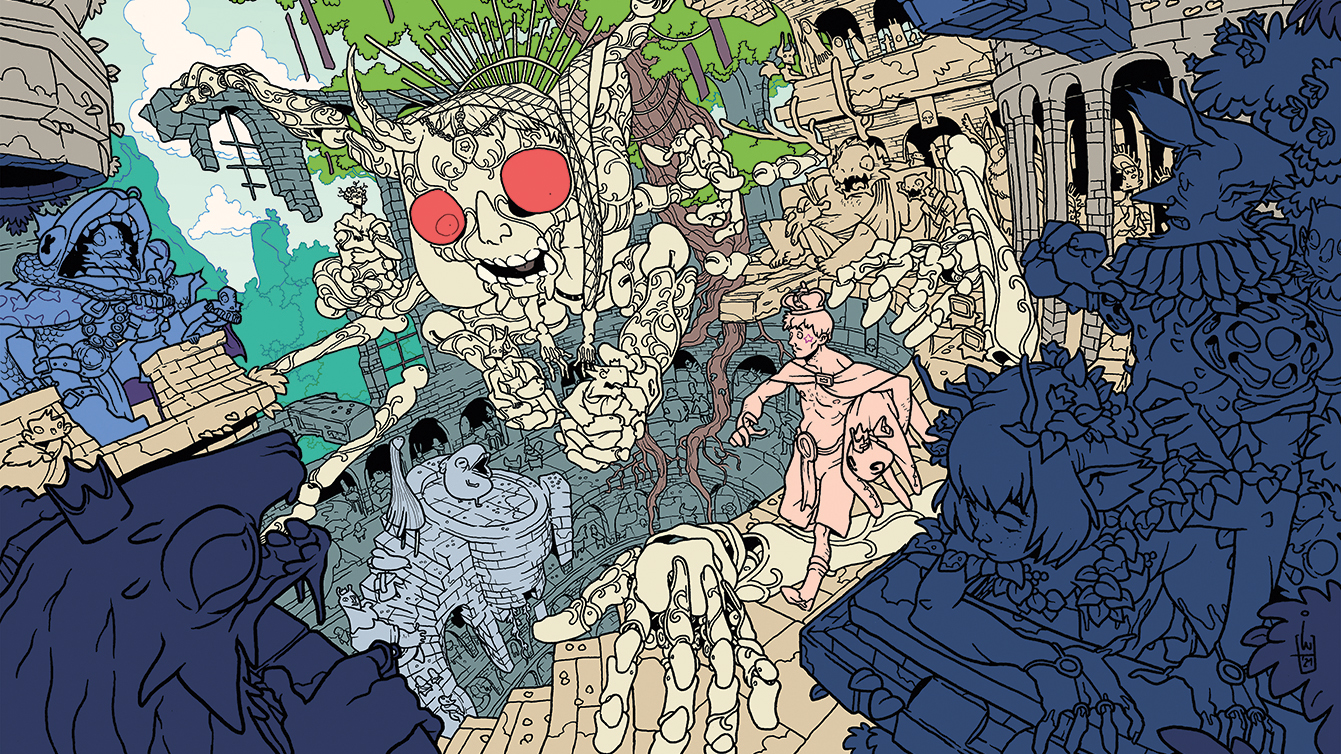
(Image: © Igor Wolski)
To see if the initial colour palette I deliver in my head teacher even works, I divide the visualise in large colour groups, based by their position and role in the illustration. Even though I change a heap of the first ideas throughout the coloring process, this helps much with enhancing the clarity of the entire piece.
12. Apply the flat colours
(Image: © Igor Wolski)
Finding the right colours is always a challenge. I mainly employment flat, simple colours without some gradients surgery textures, to balance the complex nature of the cable art. Especially with crowded pieces like this, I try to keep everything in a correspondent colour palette and set aside any contrasting colours for either the main characters Oregon key objects of interest.
13. Add u the shadows
(Image: © Igor Wolksi)
I create the shadows as a flat emblazon on a rig-transparent layer, without any form of special colouring material mixing. The best colour for shading is usually the emblazon on the opposition side of the colour roll, just since it's not always that effortless, sometimes I have to honorable render a bunch of options to undergo what works topper.
14. Make the finishing touches
(Image: © Igor Wolski)
Almost in that respect! At this point I look direct the picture and think up what else could benefit from last-minute tweaks. This can include some extraordinary effects, some patches of light or deeper shadows. After this, I like to leave the spell for the Night to look at it one more metre the next Clarence Day with fresh eyes, and we're done!
Never miss an issue of ImagineFX
If you liked this piece, you'll love ImagineFX. The global's favourite whole number art magazine is on sale in the UK, Europe, United States, Canada, Australia and more. Limited numbers of ImagineFX black and white editions are available for delivery to over 120 countries from our online store (the shipping costs are included all told prices).
- 67 brilliant uncommitted Photoshop brushes
- The best alternatives to Photoshop
- The best Photoshop plugins to use the right way today
Igor Wolski is an artist from Gdansk. He has over 10 years of experience in the illustration and comics industries, just has also worked on mobile games, film production, board games and commercials.
Related articles
Source: https://www.creativebloq.com/how-to/draw-tintin-style
Posted by: smithcathe1941.blogspot.com
0 Response to "How to draw in the Tintin style - smithcathe1941"
Post a Comment